I am Eason. It is 2026, and I am sitting in my office in China, sipping a cup of Kuding tea from Hainan Island. Just last week, I achieved a major personal milestone: I took my wife and two sons on an 1000-kilometer cycling tour around the entire perimeter of Hainan.
To be honest, that trip was much more “thrilling” than I expected. I remember one morning, while cycling along the Lingshui section of the eastern coast, my Ten-year-old son suddenly stopped, looking frustrated. He said his pedals wouldn’t move. I knelt down to check and found that when I was adjusting the gear late the night before, the derailleur position was off by less than 1 millimeter. That tiny millimeter caused the chain to grind, and we lost at least 30% of our power efficiency.
This immediately made me think of my professional life: Installing LED silicone extrusion molds. Many clients from Poland or Saudi Arabia ask me, “Eason, I bought the best extrusion machine, so why is my 1615 neon flex still uneven in thickness?” The answer is almost always found in that “1 millimeter” during installation.
Today, combined with this step-by-step installation video, I will break down how to “elegantly” install a precision mold set from the perspective of a sales engineer—and a veteran cyclist.
1. Step 1: Cleaning and the “Physical Exam.”
Just like checking tire pressure before a long ride, the first step of mold installation isn’t “installing”—it’s “looking.”
In the video, you can see the operator first using a non-woven cloth with a specialized cleaning agent to repeatedly wipe the connecting surfaces of the mold. Why so much detail? Because in 2026, the pressure inside our LED silicone extrusion machines is immense. If a tiny silicone particle—smaller than a grain of sand—is trapped between the connecting surfaces, the mold will expand under heat and create a microscopic gap, leading to leakage (flashing).
Eason’s Tip: Check the S136 mirror surface for any scratches. If you find one, treat it with polishing paste immediately. Never let a mold go to work with an “internal injury.”
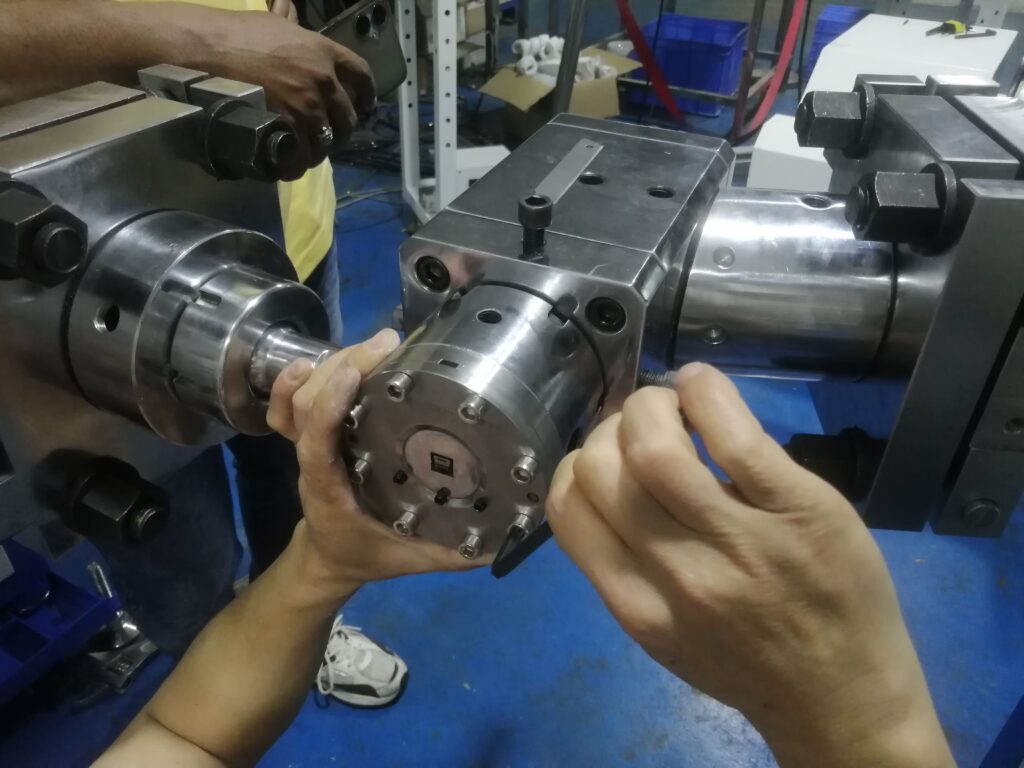
2. Step 2: The “Balance Act” of Core Pin Alignment
This is the part of the process most similar to tuning a bike’s derailleur. The video at shows the core pin entering the mold cavity.
During installation, you must ensure the core pin is at the exact geometric center. During our Hainan trip, if my son’s center of gravity shifted, he would wobble left and right. In the extrusion process, if the core pin is off by 0.1mm, the silicone layer on one side of your 1212 strip will be thinner, causing dark shadows in the light output.
- Operational Detail: Push the pin in gently by hand first to feel for any resistance.
- Hardware Trick: Use a dial indicator to check the concentricity of the pin. If your factory is still relying on the naked eye, you haven’t truly entered the era of 2026 precision manufacturing.
3. Step 3: The “Diagonal Rule” for Bolt Tightening
In the video, when the operator tightens the bolts, they don’t just go in a circle. Instead, they use the Diagonal Cross-Locking Method, much like changing a car tire.
This is vital! If you apply pressure unevenly during installation, the flow channels inside the mold will warp. It’s like braking only one side of a bicycle; the wheel will lock up and skid. Even pressure ensures that when the silicone passes through the 3-color extrusion mold, the boundaries between the base color, the reflective layer, and the diffusion layer remain sharp and distinct.
[Visual Note: The video highlights a close-up of tightening bolts in a star pattern to ensure even distribution of torque.]
4. Step 4: Line Connection and Air Purging
The final step is connecting the main extruder to the mold. The video at shows a clever trick: before starting the high-speed LED feeding, let the silicone fill the mold cavity at a low speed to purge the air.
If you run the machine at full speed immediately after installation, air trapped in the “dead zones” of the mold will become bubbles in the strip. This is a fatal flaw during IP68 waterproof testing. I told my sons that before a big hill, you must steady your breathing; installing a mold is the same—give it time to “warm up and adapt.”
Why You Need My “14-Day On-Site Guidance”
The video makes it look easy, but in reality, different silicone formulas have different shrinkage rates, and ambient temperature affects installation precision.
This is why I insist on providing 14 days of on-site installation and training with every LED silicone extrusion machine I sell. I don’t just teach your workers the steps in a video; I bring the “philosophy of balance” I learned in Hainan. I show them how to feel if a bolt is truly locked by hand and how to analyze the cross-section of the first sample to find tiny installation errors.
Conclusion: Making Production as Smooth as a Coastline Ride
After finishing the Hainan tour, my sons were tanned and exhausted, but they became much more patient. Cycling and making LED strips are the same: if you spend 5% more energy on the details of installation, you avoid 50% of the rework later.
If you are struggling with mold leakage, uneven strip thickness, or low installation efficiency, watch the video again—or just send me a message. I am Eason. I’ll bring my toolkit (and perhaps my cycling stories) to your factory to help you find that “missing 1 millimeter.”
Keywords: LED silicone strip extrusion machine, mold installation guide, 1615 neon flex, 1212 silicone extrusion, core pin alignment, 2026 production trends, Eason sales engineer, hardware maintenance, precision molds, 14-day on-site training.
- Hiring the Perfect Extrusion Engineer in 2026: A Blueprint for Your LED Silicone Production Line
- Mastering the Factory Acceptance Test: A Live Guide to Silicone LED Strip Machine Commissioning
- Zero Waste Strategy: How to Reuse Tail Materials in Silicone LED Strip Extrusion
- Passing the Torch: Teaching Silicone LED Strip Extrusion Training to the Next Generation
- Global Crisis: How the Iran Conflict is Reshaping Silicone LED Strip Production Costs