Your LED strip profile is inconsistent. The silicone won’t flow smoothly. The problem isn’t your machine; it’s likely your understanding of cold extrusion dynamics.
Successful cold silicone extrusion for LED strips depends on precise temperature control and meticulous mold handling. This guide details the correct procedures for mold installation, disassembly, cleaning, and the critical cooling management that keeps your process stable and your product perfect.
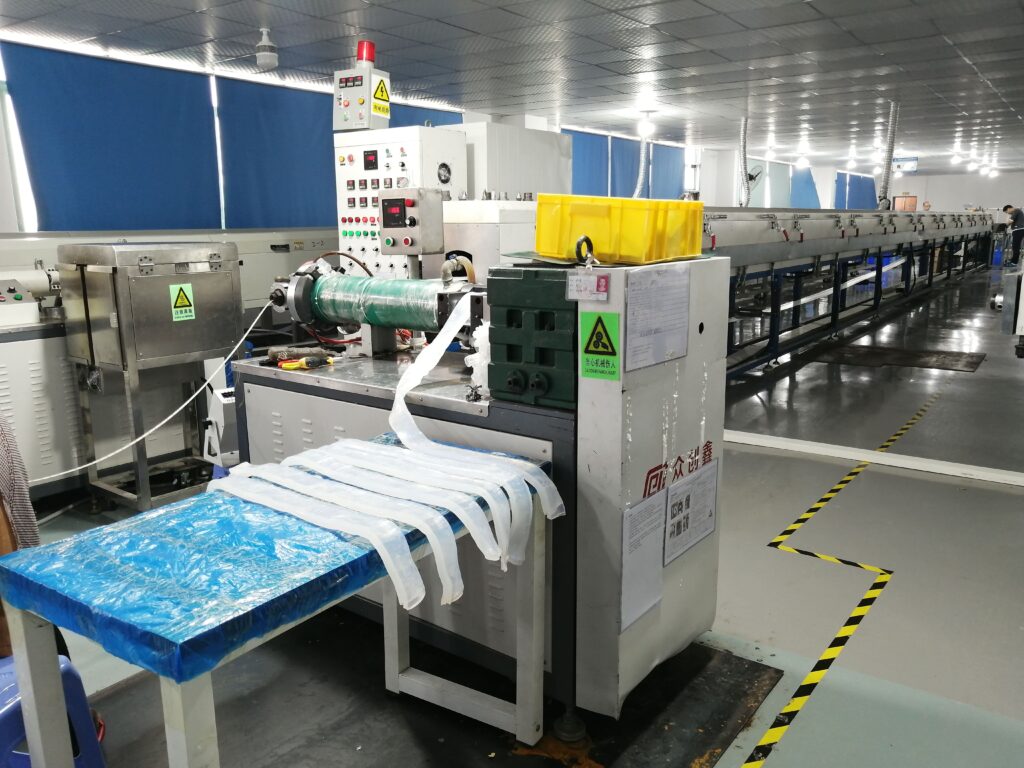
Cold extrusion is a different beast. Unlike hot plastics, silicone rubber is sensitive to heat buildup. As Eason, I’ve commissioned lines worldwide where the biggest challenge was managing temperature, not creating it. Let’s walk through the exact procedures that keep your silicone cool, your mold precise, and your production running smoothly. Learn about our cold extrusion solutions.
Chapter 1: Why is Precision Installation and Cooling Setup Non-Negotiable?
A misaligned mold or an inadequate cooling line doesn’t just cause bad strips; it causes process failure from the first minute.
Correct cold extrusion installation focuses on perfect mold concentricity and an integrated, efficient cooling system. These two factors control material distribution and prevent premature curing, forming the foundation of your entire production quality.
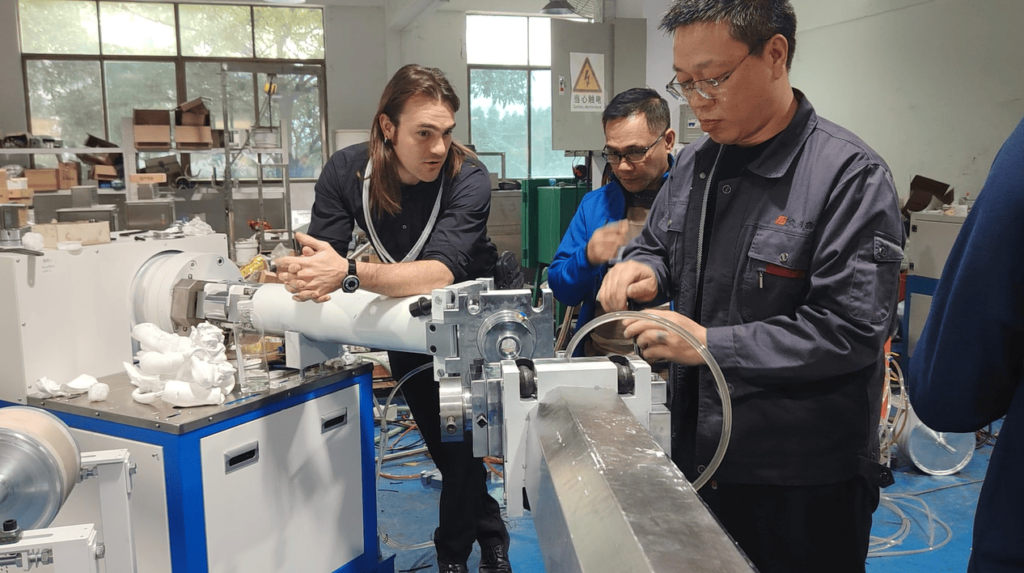
Installing a cold extrusion line is an exercise in precision mechanics and thermal engineering. You’re not just bolting on a mold; you’re integrating a temperature management system.
Step 1: Foundation and Inspection
Before mounting, every component is inspected. The mold base, core pin, and all sealing surfaces are checked for damage. Crucially, the cooling channels within the mold blocks are verified to be clear and free of debris. We also prepare the circulating water chiller, ensuring it has the capacity to maintain the required low temperature (typically 20-25°C).
Step 2: Mounting and Mechanical Alignment
The mold is carefully guided onto the extruder flange. We use alignment pins to ensure perfect bolt hole registration before any bolts are inserted. All bolts are hand-tightened in a cross pattern. Then, using a dial indicator against the core mold, we adjust the four directional set-screws until concentricity runout is within 0.02mm. This ensures the annular gap for silicone flow is perfectly even.
Step 3: Integrating the Cooling System
This is the critical step unique to cold extrusion. We connect the flexible hoses from the industrial chiller to the mold’s inlet and outlet ports. We use a two-stage connection:
- Primary Mold Cooling: Direct lines to the main mold body to absorb the bulk of conduction heat from the barrel.
- Extruder barrel Cooling: A separate line to the rotating screw’s core to remove frictional shear heat generated within the material itself.
All connections are checked for leaks. The chiller is activated and set to the target temperature. We let the system run until the entire mold assembly is uniformly cooled and stabilized, verified with contact thermometers.
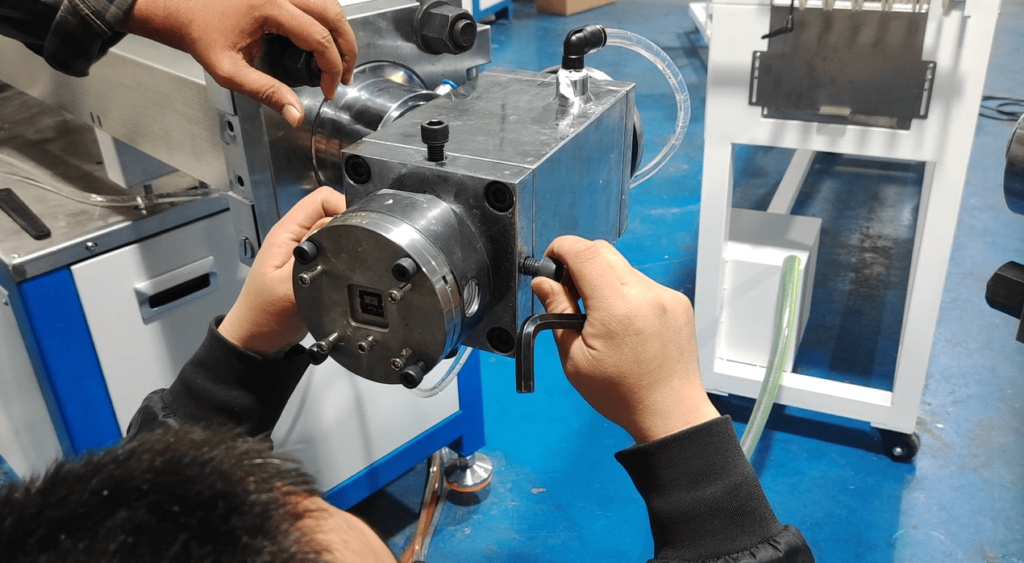
Step 4: Final Torquing Under Stable Conditions
Only after the mold has reached a stable, cooled state do we perform the final torquing of all bolts with a calibrated wrench. Metal contracts when cooled. Torquing under stable, low temperature ensures clamping force remains consistent during production, preventing leaks or shifts.
This rigorous procedure ensures your line starts with the capability to manage the heat that the process itself creates, which is the essence of controlled cold silicone extrusion.
Chapter 2: What is the Safe Protocol for Disassembling a LED Strip Extrusion Mold?
Disassembling a mold after running cold silicone involves unique hazards: uncured material, water residues, and precise components that must remain uncontaminated.
Safe disassembly requires purging to clear material, careful disconnection of cooling lines to drain water, and a sequential teardown that protects the mold’s sealing surfaces and intricate cooling channels from damage.

The presence of a cooling system adds steps to the disassembly process. Rushing it can lead to water damage to the machine, corrosion in the mold, or hydraulic lock.
Phase 1: Post-Production Shutdown and Preparation
- Systematic Purge: We run a compatible purging compound or the last of the silicone batch to clear the screw and mold channels of most material. For silicone, this is especially important to prevent any material from curing in place after shutdown.
- Cooling System Deactivation and Drainage: We turn off the chiller. Then, we carefully disconnect the cooling hoses at the mold ports, allowing any residual water in the lines to drain into a catch pan. We use air blow guns to gently evacuate remaining droplets from the mold’s external ports to prevent ingress into the assembly.
- Tool Preparation: We gather tools, including bend wrenches for tight spaces, and ensure the work area is dry.
Phase 2: Sequential Cold Mold Teardown
The principle remains to work from the outside in, but now with dry components.
- Remove Ancillaries: We take off any sensor cables or mounting brackets.
- Loosen Main Bolts: We break the torque on all main body bolts in a cross pattern.
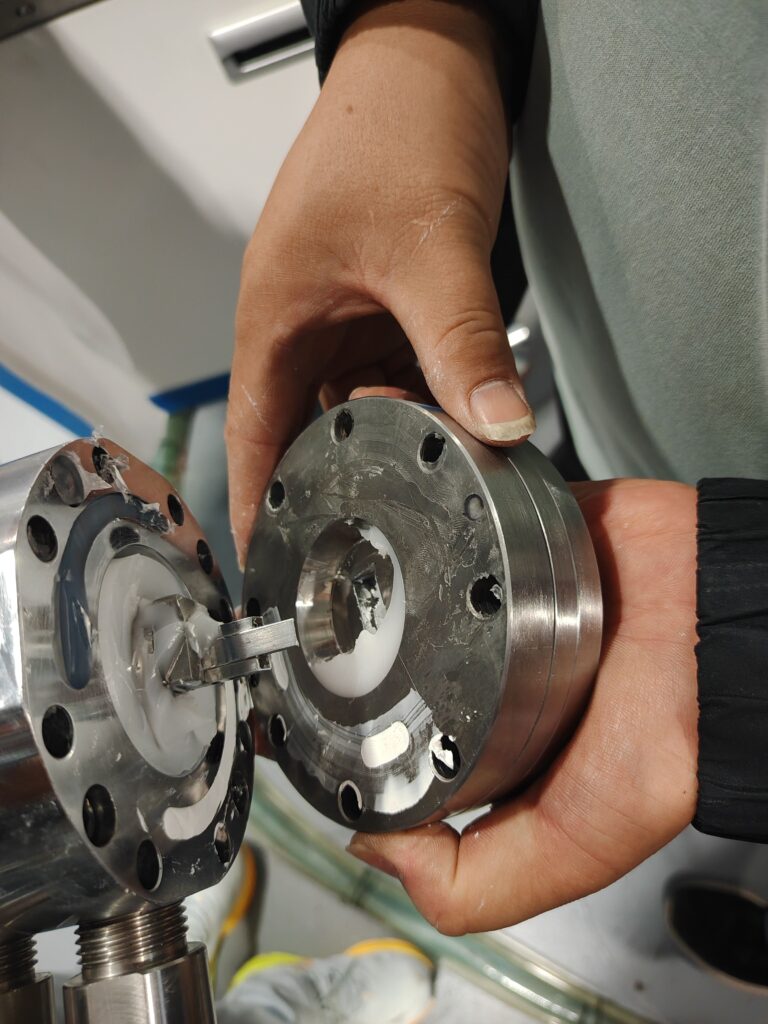
- Separate the Front Die Plate (前模): We gently tap around it with a soft mallet and lift it straight off. We immediately clean any residual silicone from its face and cooling interface.
- Extract the Core Pin: The core mold is removed and set aside for dedicated cleaning. We check its internal cooling channel (if present) for any blockage.
- Disassemble the Main Body: After removing the bolts, we separate the main housing blocks. We pay special attention to the O-rings or gaskets sealing the internal cooling passages, inspecting them for wear.
Forcing components is a sign that a cooling line may still be connected, a bolt is missed, or material has solidified. The goal is a clean, dry, and organized mold set ready for the next stage: deep cleaning.
Chapter 3: How Do We Clean a Mold Designed for LED Strip Extrusion?
Cleaning a LED extrusion mold isn’t just about silicone residue; it’s about preventing corrosion in water channels and maintaining flawless surface finishes for material flow.
Effective cleaning addresses two areas: removing all silicone from forming surfaces and flow paths with specialized tools, and flushing/descaling the internal cooling channels to maintain thermal efficiency and prevent corrosion.

Water-cooled molds introduce a maintenance dimension that air-cooled or heated molds do not have. Our cleaning protocol is therefore bifocal.
Procedure for Material Flow Paths
The inner mold structure and die lips are cleaned with the same rigor as any precision tool. We use solvent and long brushes to scrub the material path. For the core pin and die faces, we use soft cloths and plastic scrapers. The objective is to restore a perfectly smooth, residue-free surface that offers no resistance to the cold, viscous silicone.
Procedure for the Cooling System(If long-time stop)
This is the added critical step.
- Channel Flushing: We connect a pump to flush the internal cooling channels of each mold block with a mild acidic or descaling solution to dissolve any mineral deposits from the cooling water.
- Inspection for Corrosion: After flushing, we use borescopes to visually inspect the channels for signs of pitting or galvanic corrosion.
- Drying and Anti-Corrosion Treatment: We thoroughly flush the channels with deionized water, followed by compressed air to ensure they are completely dry. Finally, we may circulate a light, food-grade corrosion inhibitor if the mold will be stored for an extended period.
- Seal Replacement: We routinely replace all O-rings and gaskets that seal the cooling passages to prevent costly water leaks during production.
A clean mold set is one that is pristine both inside and out—its forming surfaces perfect and its cooling system unobstructed. This dual cleanliness guarantees both product quality and process stability.
Chapter 4: How Does Mastering LED Strip Extrusion Management Drive Efficiency?
In cold extrusion, control is everything. Mastering temperature and tooling isn’t an operational cost; it’s your primary lever for profitability.
Expert management of the LED extrusion process minimizes silicone waste due to curing issues, drastically reduces energy consumption compared to hot processes, extends tool life by preventing thermal stress, and enables faster production cycles through stable, predictable flow.
The economic advantages of a well-run cold silicone extrusion line are profound and touch every aspect of the operation.
The Direct Financial Impact
- Near-Zero Thermal Scrap: In hot processes, scrap from degradation or uneven heating is common. In a properly cooled process, material properties remain stable. Defects like bubbles inside the strip or uneven extrusion are primarily mechanical or material-related, not thermal, making them more predictable and solvable.
- Dramatically Lower Energy Use: The largest energy consumer in a hot extruder is the heater bands. In cold extrusion, the major load is the chiller, which is inherently more efficient. This can translate to energy savings of 30-50% for the extrusion process itself.
- Extended Tool and Machine Life: Consistent low temperatures prevent thermal cycling fatigue in the mold, screw, and barrel. There is no thermal expansion and contraction stress. This can double the service life of these high-cost components.
Strategic and Quality Benefits
- Superior Product Consistency: Cold processing allows for tighter control over the silicone’s viscosity and cure kinetics. This results in LED strips with more consistent dimensions (perfect-shape), better adhesion, and reliable performance.
- Enhanced Safety and Simplicity: Without high-temperature surfaces, the work environment is safer. Process control focuses on mechanics and cooling, which are often easier for operators to monitor and adjust than complex multi-zone heating profiles.
- Competitive Material Flexibility: A stable cold process can handle a wider range of silicone compounds, including those with heat-sensitive additives or specific cure systems, giving you a broader product portfolio.
The factories that lead in LED strip manufacturing are those that have moved beyond simply running an extruder to actively managing a thermally stable system. They don’t fight heat; they respect its generation and relentlessly remove it. This philosophy turns their production line into a model of efficiency and quality.
Conclusion
Mastering cold silicone extrusion is about embracing a philosophy of heat management and precision mechanics. From the initial mold installation with its integrated cooling to the meticulous cleaning of water channels, every procedure is designed to maintain stability, ensure quality, and maximize the lifespan of your capital investment.
Are you struggling with process instability, high scrap rates, or unpredictable quality in your silicone extrusion?
The solution lies in precise temperature control and tooling discipline. I can help you audit your current process, implement correct cooling protocols, and train your team in the specialized maintenance routines required for cold extrusion.
Contact me, Eason, for a consultation on optimizing your cold silicone extrusion line. Let’s build a process that is as cool and reliable as your product.