You want a smooth, profitable production line. But bubbles, bad shapes, and peeling silicone keep stopping you. You can fight each defect, or you can build a process that stops them from ever appearing.
Preventing extrusion defects is not about luck. It is about controlling five key areas: your raw material, your tooling precision, your pre-process preparation, your thermal management, and your team’s discipline. A system built on these pillars produces consistent, high-quality silicone LED strips.
I am Eason. I have helped factories on three continents build these pillars. I remember a client in Poland. They fought daily fires—bubbles one day, uneven strips the next. We stopped fixing problems. We rebuilt their process from the ground up. Their line now runs for weeks without a single defect strip. This is the method we used. Let me show you how to build your own defect-proof foundation. Explore our machines designed for stability.
Pillar 1: Master Your Material from the First Gram
Your final product is only as good as your raw silicone compound. Inconsistent material is the root cause of over half of all extrusion defects.
Preventing material-related defects requires strict control over compounding, storage, and handling. You must ensure batch-to-batch consistency in viscosity, cure profile, and additive dispersion to give your extruder a perfect starting point.
A common story: a production line runs perfectly for a week. Then a new batch of silicone arrives. Suddenly, bubbles appear inside the strip, or the curing time in the oven changes. The team blames the extruder. But the extruder only processes what you feed it. The problem started in the material room. To prevent this, you need a fortress-like system around your silicone rubber compounding.
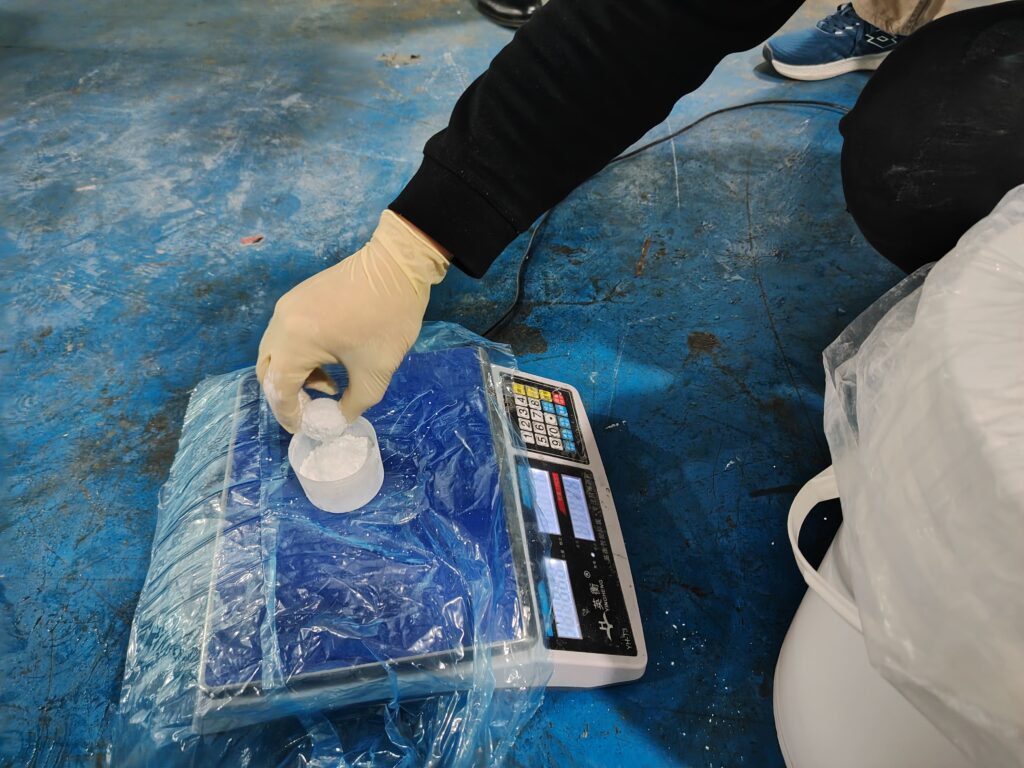
First, you must control formulation with absolute precision. I train teams to treat the weighing scale like a medical instrument. Adding a platinum-curing agent or a diffuser like TiO2 is not guesswork. We use digital scales and follow written formulas. Every gram matters. We record the batch number of every raw material on logbook. This traceability is your first defense. If a defect appears later, you can trace it back to a specific drum of polymer or a batch of catalyst.
Second, storage is critical. I have opened storage rooms where bags of diffuser agent powder were clumped together due to humidity. This causes uneven dispersion and poor light diffusion. We now store sensitive powders in sealed containers. We even store critical mold parts and some compounds in a freezer. This prevents premature curing and maintains dimensional stability. A clean workshop policy extends to the material area. Contamination from dust or other chemicals is a silent killer of consistency.
Third, you must validate every batch. Do not assume a new mix is good. We perform a simple cure test on a small sample before it ever touches the extruder. We check the viscosity. Sometimes we run a few kilos through a test extruder. This small investment of time prevents wasting a ton of material on a bad production run. This systematic approach to silicone material preparation eliminates the most common variables before they reach your main line. It turns your material from a source of problems into a pillar of reliability.
Pillar 2: Achieve and Maintain Perfect Tooling Alignment
A misaligned mold does not make a slightly bad product. It makes a consistently defective product. Your tooling precision sets the physical limits of your quality.
Preventing profile defects requires flawless mold concentricity, clean and undamaged flow surfaces, and a rigorous maintenance schedule. The goal is a perfectly uniform gap for the silicone to flow through, every single time.
Imagine a perfectly round hose. If you step on one side, the water squirts out unevenly. Your extrusion mold works the same way. If the core pin is off-center by even a few hundredths of a millimeter, your silicone will flow faster on one side. The result is a strip with uneven extrusion—one wall thick, one wall thin. I see this defect constantly. The fix is not to run the machine slower. The fix is to go back to the foundation: mold concentricity adjustment.
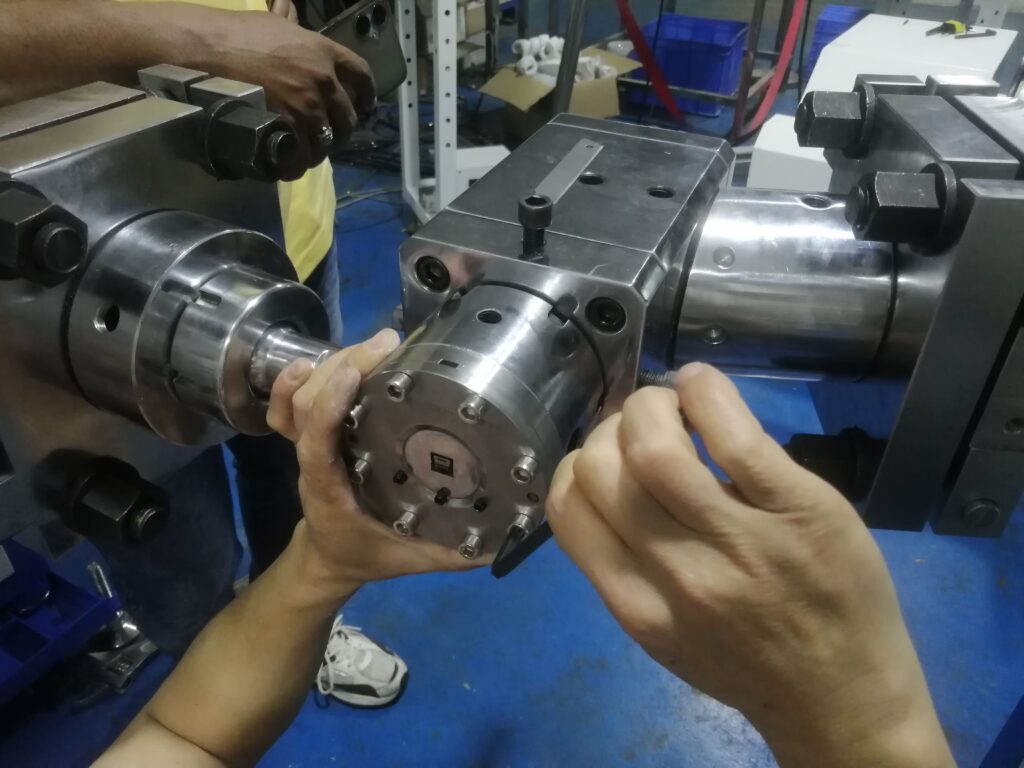
The process is meticulous but straightforward. We mount the mold on the machine. Then we attach a dial indicator. We rotate the core pin and watch the gauge. The needle tells us the truth. We then adjust the four directional set-screws on the mold housing. We make tiny turns. We check again. We repeat this until the runout is nearly zero. This is not a one-time job. You must check concentricity after any mold disassembly, and periodically during long runs. Vibration can slowly shift things.
But alignment is only half the battle. The inner mold structure must be spotlessly clean. Even a small piece of cured silicone stuck in a flow channel will disrupt the material stream. It creates a dead spot that leads to thin areas or lines on your strip. We implement a strict cleaning protocol. After a run, we disassemble the mold set. We use the right tools—brushes, plastic scrapers, proper solvents. We inspect every surface under bright light. We look for scratches or wear on the die lips. A damaged surface will mar every meter of strip you produce. This extrusion mold care is not downtime. It is quality-building time.
Finally, you must manage temperature. For cold silicone extrusion, the mold must be cool and uniform. We connect it to a chiller system with balanced flow. If one cooling line is clogged, that side of the mold gets warmer. The warmer silicone flows easier. This again leads to an unshape cross section. We check inlet and outlet water temperatures to ensure even cooling. By combining mechanical precision, perfect cleanliness, and thermal control, you turn your mold from a source of defects into a guarantee of perfect profiles.
Pillar 3: Control the Critical Stage Before Extrusion
The moment the bare LED strip enters the mold is a point of no return. Any flaw on that PCB will be sealed inside your product forever.
Preventing adhesion and electrical failures requires flawless PCB inspection, a perfectly controlled priming process, and precise guidance into the mold. This stage ensures the silicone has a perfect surface to bond to and a perfect path to follow.

This is the most overlooked pillar. I visited a factory in Vietnam. Their silicone was peeling off in sheets. They blamed the material supplier. We stopped the line. We took a bare LED strip from their pay-off machine. We looked closely. The copper traces had a faint oily film. Their workers handled the PCBs without gloves. The oil from their fingers prevented the primer from bonding. The problem was not in the extruder; it was in their hands. PCB surface preparation is that critical.
Your first step is incoming inspection. You must check the bare strips before they go on the reel. Look for solder joints with spikes. These sharp points can be blocked in the mold path. Look for dust or flux residue. Use a good light. This simple check stops many problems before they start.
Next, the priming process is a science, not a casual step. The primer coating device must apply a thin, even layer. The primer itself is often a two-part mix. It must be a 1:1 ratio. If the ratio is wrong, the primer will not cure properly. It will act as a release agent, not a bonding agent. We train teams to mix primer in small, controlled batches. We verify the coating thickness. We ensure the primer is dry before the PCB enters the mold. A wet primer will turn to steam in the hot barrel and cause bubbles inside the strip.

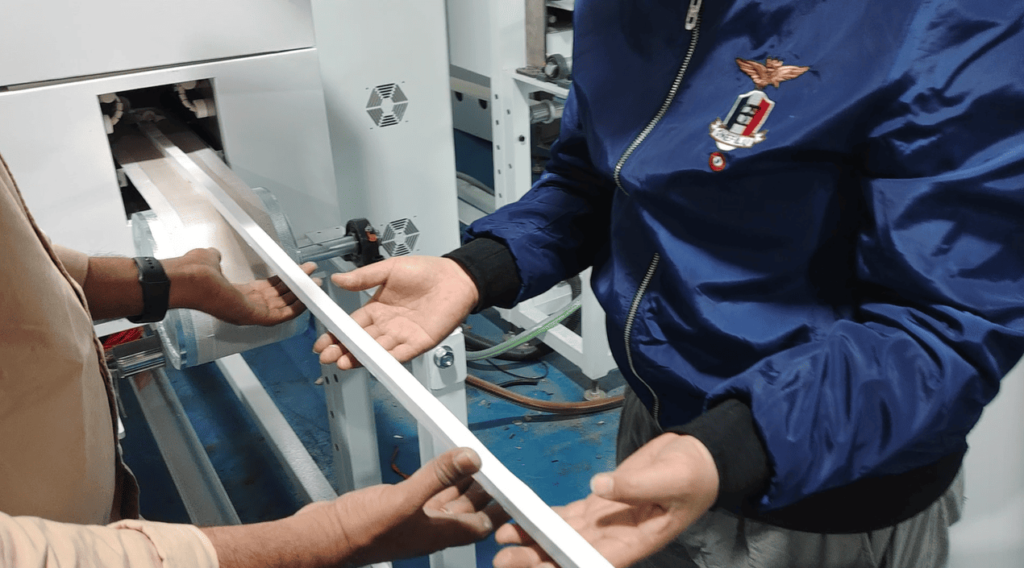
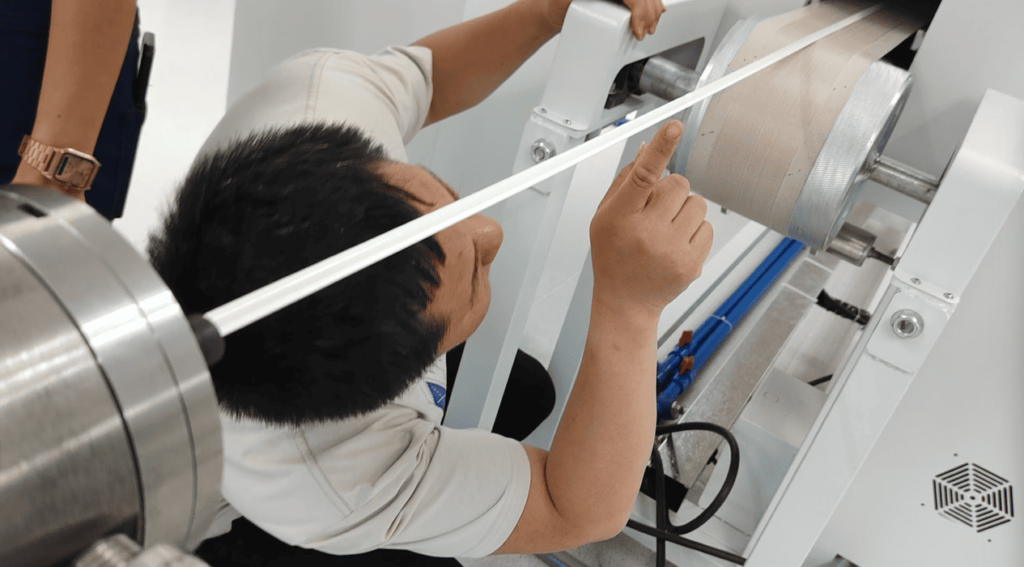
Finally, guiding the strip into the mold is a skill. If the PCB is crooked, it will rub against the core mold. This can cause scratches or even strip breakage. We practice the threading process during training. We use guide rollers to ensure straight entry. We call this “getting the PCB through the mold” correctly. It seems simple, but a mistake here causes a cascade of defects. By controlling these pre-extrusion steps with military discipline, you build a bridge of quality that carries your product safely into the encapsulation process. You give the silicone no reason to fail.
Pillar 4: Implement Unwavering Process Discipline
Even with perfect materials and tooling, a process without discipline will drift. Small changes add up to big defects over an 8-hour shift.
Preventing process drift requires setting, documenting, and locking key operating parameters. It demands routine equipment checks and a culture where operators do not make unsupervised adjustments to chase short-term output.
A line in Iran had a strange problem. Every afternoon, their silicone LED strip would start to develop a rough surface. The morning shift produced perfect strips. The team leader would increase the screw speed slightly after lunch to boost output. This small change generated more shear heat. Their cooling system was already at its limit. The extra heat changed the silicone’s viscosity at the die. This caused the rough surface defect, called melt fracture. The problem was not mechanical. It was a lack of process discipline. The operator’s good intention to produce more actually created waste.
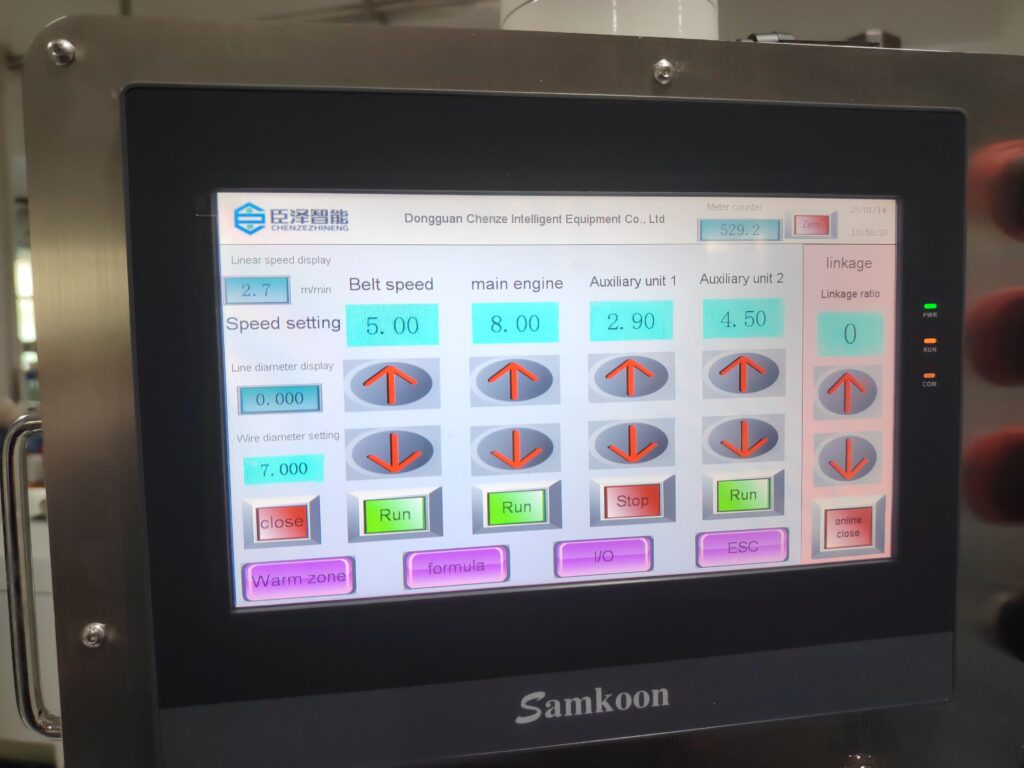
You must define the “golden recipe” for each product. This is not one number. It is a set of parameters: screw RPM, head pressure, chiller temperature, and conveyor speed. You must write this recipe down. You must display it at the control panel. Most importantly, you must explain to the team why these numbers are interlocked. Changing one requires checking the others. I help teams create simple run sheets. Operators record key parameters every hour. They plot the numbers. A stable process shows flat lines on the chart. A drifting process shows a trend. This visual tool makes problems obvious before defects appear.
Your cooling system is the guardian of stability in cold extrusion. You must maintain it. A dirty filter on the industrial chiller reduces its efficiency. The water temperature slowly rises. This slowly heats the mold. Over hours, the strip profile changes. We schedule weekly chiller checks. We monitor the temperature difference between water going in and coming out. A growing difference means the system is working well. A small difference means heat is not being removed effectively. This is predictive maintenance. It stops thermal drift before it starts.
Finally, build a culture of “check first, adjust later.” Empower your technicians to do routine checks. They should check mold concentricity with simple gauges. They should inspect the strip quality from the bottom regularly. If they see a change, they must check the process parameters against the golden recipe before turning any knobs. This disciplined approach turns your production line from a reactive machine into a predictable asset. It ensures the quality you achieve at 9 AM is the same quality you get at 5 PM.
Pillar 5: Build a Team That Owns the Quality
Machines do not prevent defects; people do. Your team’s knowledge, vigilance, and sense of ownership are the final and most important pillar.
Preventing defects through your team involves comprehensive hands-on training, clear standard operating procedures (SOPs), and fostering an environment where stopping the line to fix a potential problem is celebrated, not criticized.
I trained a team in Saudi Arabia. We spent days on procedures. One young technician, Ahmed, was very careful. Two months later, he called me. He said, “Eason, the strip looks good, but the sound from the extruder is slightly higher pitched. Should I stop?” I told him to stop and check. He found a slightly worn bearing in the gearbox. It had not caused a defect yet, but it would have. Ahmed stopped a major breakdown because he understood his machine. He owned the quality of his line. This is the ultimate goal: building a team that owns the process.
Training cannot be just a lecture. It must be hands-on training. We do not just tell people how to clean the extruder screw. We make them do it. We show them the wrong way to disassemble a mold. We let them see how silicone hardens and locks the parts. This makes the correct procedure memorable. We create SOPs with photos. We film videos of critical steps like threading the first meter of strip. This becomes their reference library. Knowledge is not power unless it is shared and practiced.
You must give your team the authority to act on their knowledge. If an operator sees a material gap on the LED strip, they must have the power to stop the line. Their manager must support this decision. We implement a simple “andon” system. A yellow light means “caution, checking something.” A red light means “stopped for a quality issue.” The goal is to fix small problems before they become big wastes. Celebrate when the line stops for a quality check. This changes the culture from “push volume” to “make it right.”
Finally, involve them in problem-solving. When a defect does occur, bring the team together. Show them the defective strip cross-section. Ask for their ideas. The man who feeds the material might notice it feels different. The woman who winds the reel might see a slight wobble. Their daily observations are your best data. By respecting their eyes and ears, you build a human sensor network that no machine can match. This fifth pillar turns your other four technical pillars into a living, breathing system that constantly defends against defects. Your team becomes your most reliable quality control instrument.
Conclusion
Preventing silicone LED strip extrusion defects is a proactive strategy. It is about building a system on five strong pillars: material mastery, tooling precision, pre-process control, process discipline, and team ownership. This system does not just fix problems; it makes them unlikely to occur in the first place.
Ready to stop fighting defects and start building a defect-proof process?
Let’s audit your current operation against these five pillars. I can help you identify weak points, implement robust procedures, and train your team to become guardians of quality.
Contact me, Eason, to start building your foundation for flawless production. Send me your biggest quality challenge, and let’s solve it at the root.