Bubbles, bad shapes, peeling silicone—these problems stop your line and waste money. But they all have clear causes and solutions.
This guide tackles the five most common defects in silicone LED strip extrusion: air bubbles, uneven profiles, poor adhesion, material feed issues, and flow instability. For each problem, we explain the root cause and provide step-by-step fixes you can apply on your production floor.
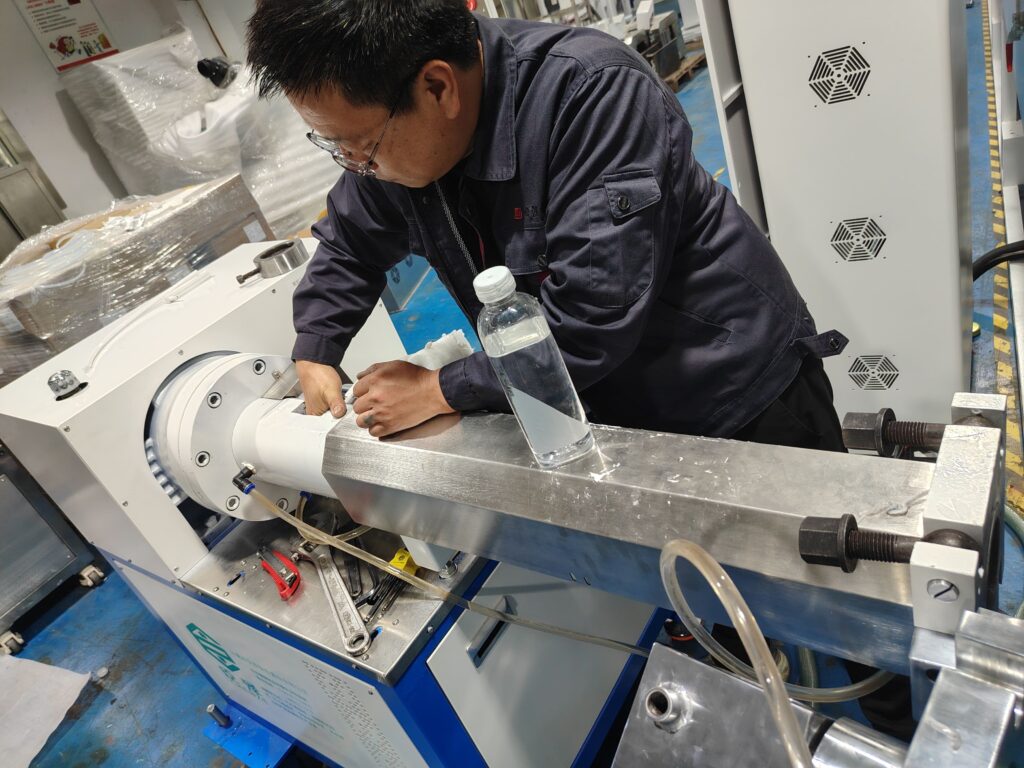
I’m Eason. I’ve stood next to extrusion lines from Saudi Arabia to Vietnam, and 80% of the downtime calls are about these same five issues. Understanding them isn’t just for engineers; it’s for every operator and manager who wants a smooth-running line. Let’s turn your problem strips into perfect product. See our robust extrusion machines built for stability.
Problem 1: Why Are There Bubbles and Voids Trapped Inside My LED Strip?
Air bubbles ruin waterproofing and cause dark spots in your light. They don’t just appear; they’re trapped.
Bubbles inside the silicone strip are caused by entrapped air or volatiles. The solution involves a three-step approach: ensuring proper material degassing, optimizing screw design to avoid air entrainment, and maintaining correct head pressure during extrusion.

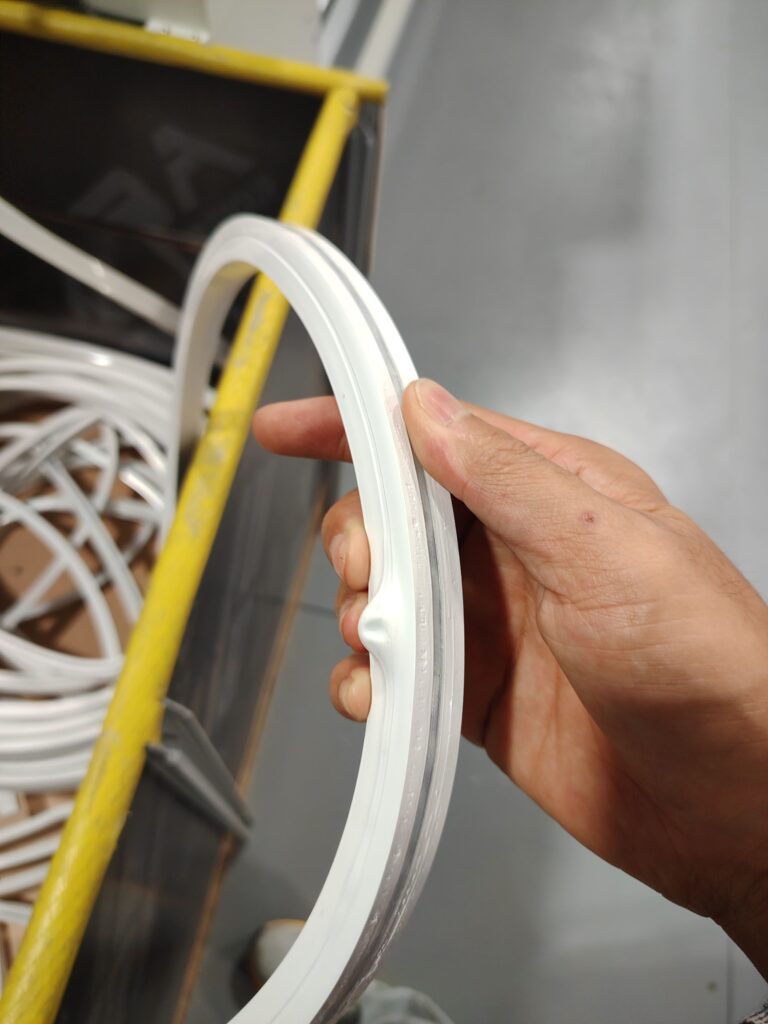
Seeing bubbles inside the strip is frustrating. The strip might even bulge out where large pockets form. This is a failure of your material and process to exclude air.
Root Cause Analysis:
Air gets in through three main doors:
- Material-Based Air: The silicone compound itself can contain entrapped air from the mixing and refining process. If the material isn’t properly degassed or is used too soon after mixing, this air gets extruded.
- Process-Based Air: The wrong screw design or speed can “whip” air into the material at the feed throat. A worn screw and barrel can also create spaces for air to be trapped.
- Volatiles: Low-quality materials or some additives can release gases (volatiles) when heated in curing oven, creating tiny bubbles.
Step-by-Step Solutions:
Don’t just run the line faster and hope it goes away. Follow this sequence:
- Check Your Material First: Allow newly mixed compound to rest (cure) for the recommended time before use. This lets entrapped air escape.
- Optimize the Screw Process: For cold extrusion, ensure your screw has a compression section designed for silicone to gradually push air back toward the hopper. Reduce screw speed if it’s too high.
- Increase Head Pressure: Add or fine-tune a screen pack before the mold. This increases back pressure, which helps compress any remaining tiny air bubbles and forces them to dissolve into the material.
- Inspect and Maintain: Check for wear in the screw and barrel. A worn flight can’t convey material smoothly, creating pockets for air.
Quick Diagnostic Tip: If bubbles are random, think material or process air. If they appear in a regular pattern, suspect a mechanical issue like a damaged screw flight. Start with your material logbook—it often holds the answer. Need help with material formulation?
Problem 2: Why is My Extruded Strip Shape Uneven or Distorted?
A strip that is wider at the top, bent, or just inconsistent won’t fit profiles and looks unprofessional. The mold is talking to you.
An uneven cross-section (e.g., top-wide/bottom-narrow) or a strip that bends as it exits is a mold and flow issue. Fixes involve checking mold concentricity, ensuring even cooling, and balancing the flow rates in multi-layer extrusion.
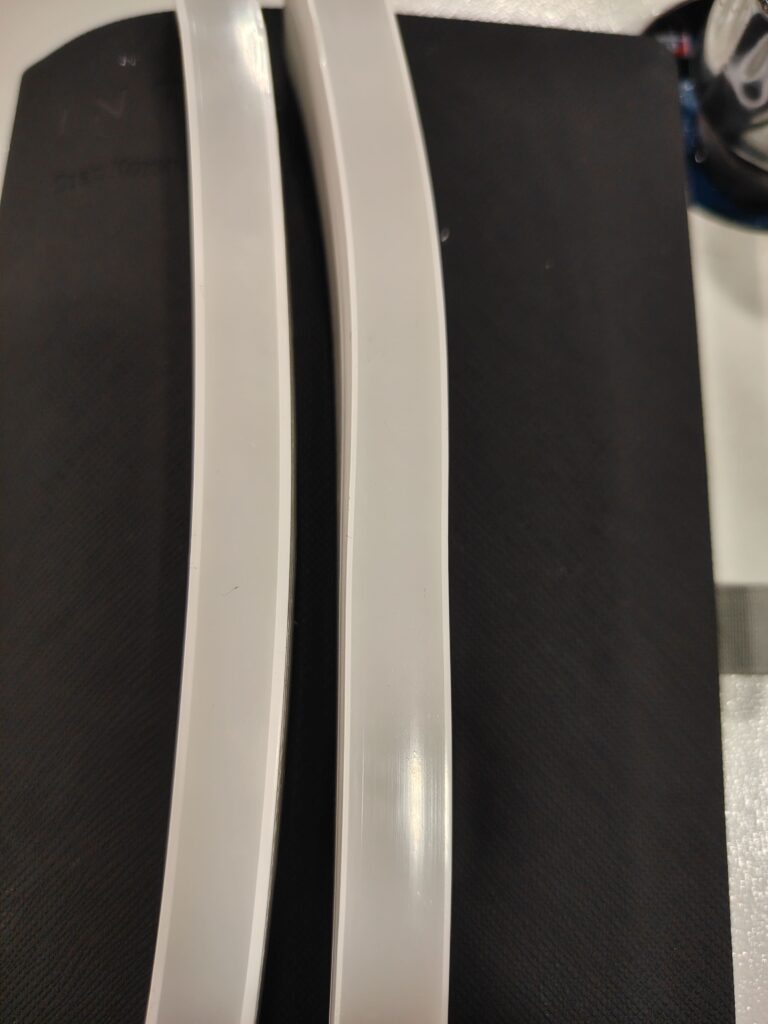
A perfect cross-section of a silicone-strip-tube-profile should be symmetrical. When it’s not—like a strip bending up or showing uneven extrusion—your material is not flowing evenly through the die.
Root Cause Analysis:
This problem points directly to imbalance:
- The #1 Cause: Mold Misalignment. If the core mold is not perfectly centered in the die (poor concentricity), the gap for silicone to flow is thicker on one side. This gives you a strip with one side thicker.
- Uneven Cooling: In cold extrusion, if cooling is not uniform across the mold, the silicone on the warmer side will flow more easily and be thinner upon exiting.
- Multi-Layer Imbalance: For two-color or three-color extrusion, if the material from each extruder flows at different rates or viscosities, it can cause the combined strip to warp or curl.

Step-by-Step Solutions:
Go back to the basics of tooling and temperature.
- Verify and Adjust Concentricity. This is the first and most critical check. Power down, and use a dial indicator to measure the runout of the core pin. Use the four directional set-screws to make micro-adjustments until it’s centered.
- Audit Your Cooling System. For the cold extrusion mold, feel all cooling lines. Ensure water is flowing evenly to all zones. Check for a clogged line or a faulty thermostat causing one side of the mold to be warmer.
- Balance Co-Extrusion Feeds. If running multiple layers, you must calculate the material dosage for each layer precisely. Use the control panel to meticulously match the output (grams/minute) of each extruder to the designed ratio. A three-color strip coming out wrong is almost always a feed ratio error.
Quick Diagnostic Tip: Look at the cut-off cross-section. If the thickness variation is consistent around the circle (e.g., always thick on the left), it’s mold alignment. If the strip bends in one direction, it’s likely uneven cooling or co-extrusion imbalance. Start with the dial indicator.

Problem 3: Why Does the Silicone Peel Off the PCB?
The most catastrophic failure: the silicone encapsulation simply separates from the LED strip. This isn’t a glue problem; it’s a chemistry and preparation problem.
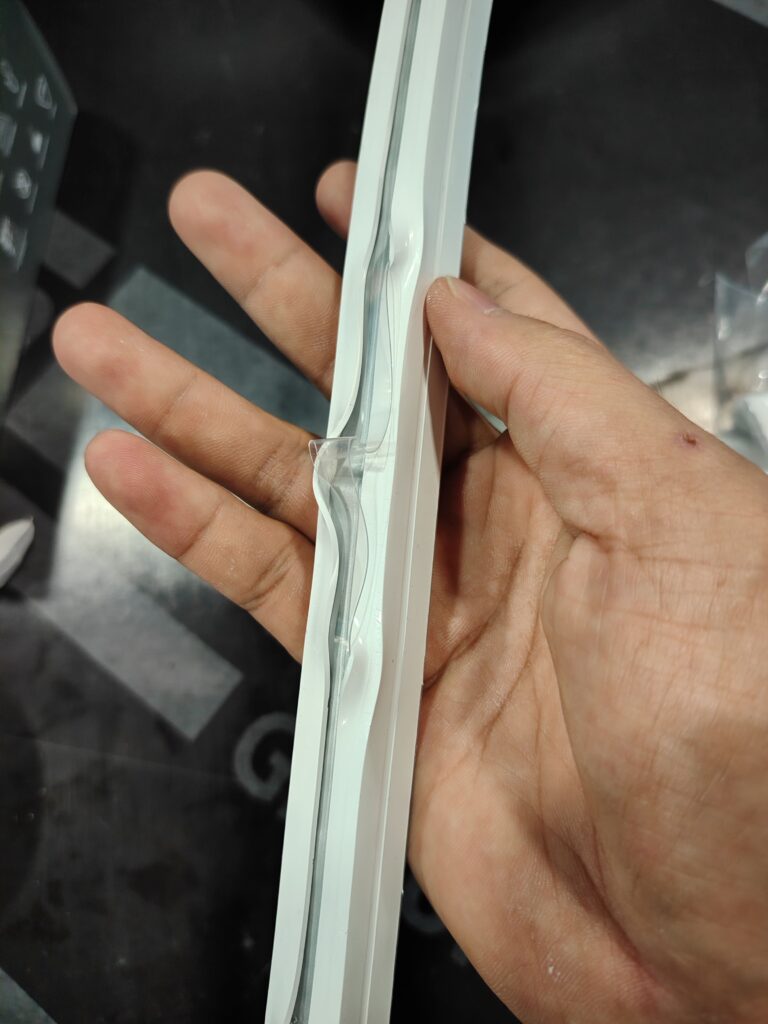
Adhesion failure (delamination) occurs due to a contaminated PCB surface, incorrect or missing primer, or using a silicone compound incompatible with the PCB’s solder mask. The fix requires strict pre-treatment protocols and material compatibility testing.
When you cut off the silicon strip to test adhesion, you should see a seamless bond. If you see a clean gap, your product will fail in the field. This isn’t about extrusion speed; it’s about surface science.
Root Cause Analysis:
Silicone needs a clean, active surface to bond to.
- Dirty or Contaminated PCB: Oils, dust, or release agents from handling can coat the PCB. Solder joints with spikes (凸刺) can also create physical points of stress that initiate peeling.
- Missing or Incorrect Primer: Most LED strips require a specific primer coating to act as a chemical bridge. Using the wrong primer, applying it unevenly, or skipping it entirely guarantees failure.
- Material Incompatibility: Not all silicone formulas bond well to all types of PCB solder mask (the green coating). A mismatch here means no amount of primer will help.
Step-by-Step Solutions:
You must control the stage before the extrusion die.
- Implement Rigorous PCB Cleaning: Institute a cleaning step for bare LED strips before they go to the primer station. Use lint-free cloths and appropriate solvents.
- Standardize the Priming Process: The primer coating device must be calibrated. Ensure the primer is a 1:1 ratio mixture if it’s a two-part type. The coating must be thin, even, and fully dried (but not over-cured) before entering the mold.
- Perform a Compatibility Test: Before full production, conduct a bond test. Apply your primer to a sample PCB, encapsulate it with your silicone, and use a knife to cut and test the adhesion. Do this for every new batch of PCB or silicone material.
Quick Diagnostic Tip: If the silicone peels off cleanly, leaving a shiny PCB surface, the problem is contamination or missing primer. If the silicone tears and some residue stays on the PCB, the bond is okay but the silicone’s tear strength might be low. Start by auditing your priming station logs.
Problem 4: Why is Material Feeding Unstable or Inconsistent?
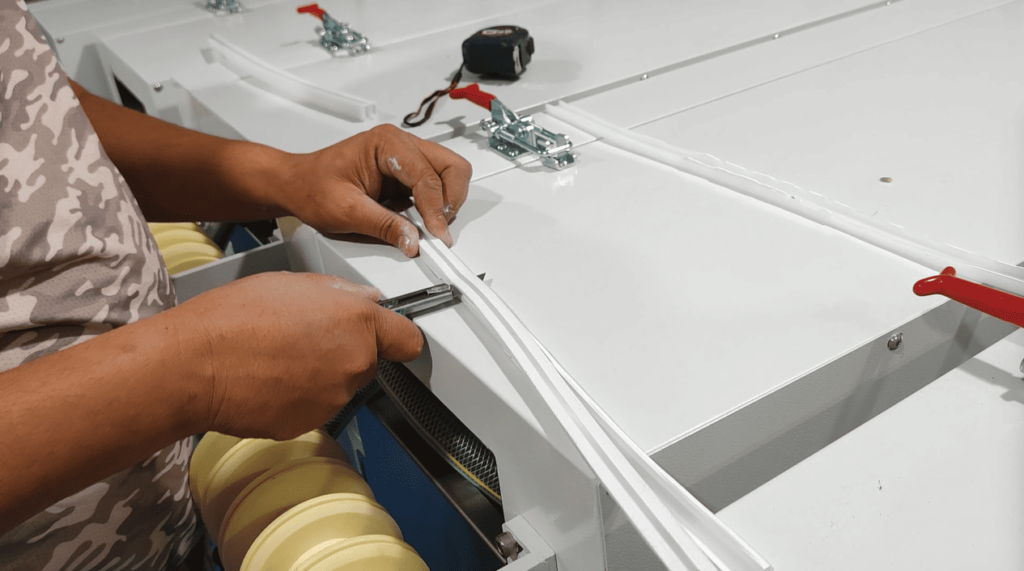
The extruder “starves,” the strip thickness varies in long cycles, and you can’t hold a steady pressure. The problem starts at the very beginning.
Unstable feeding is caused by issues with the silicone compound’s physical form (bar), the feed throat design, or the screw’s initial flights. Solutions range from reforming the material to modifying the feed throat geometry and checking for wear.

A perfect mold can’t fix bad feeding. If the screw isn’t getting a consistent, solid bite of material, everything downstream becomes unstable.
Root Cause Analysis:
Look at the interface between the solid material and the turning screw.
- Poor Material Form Factor: The silicone bar for manual feeding might be too hard, too soft, or an irregular size. Automatic feeding machines can jam if the cut bars are inconsistent or if the material is too sticky.
- Feed Throat Design: The angle and surface of the feed throat may not be optimal for cold, high-viscosity silicone, causing it to “bridge” (form an arch) and stop flowing.
- Screw Wear at the Feed Section: The first few flights of the screw, which grab the material, can wear down. A worn flight has less “bite,” leading to slippage and inconsistent feed rates.
Step-by-Step Solutions:
You need to ensure the material enters the screw predictably.
- Standardize Material Input: Whether using manual feeding or an automatic feeder, the silicone compound must be in a consistent physical state. For bars, ensure diameter and hardness are uniform. For pellets, ensure they are free of dust and fines that can melt and clog.
- Modify the Feed Throat: This might involve a technical fix. Adding a stirring aid in the throat, using a forced feed system, or lining the throat with a low-friction material can help. In some cases, the feed throat angle needs to be adjusted by a machinist.
- Inspect and Measure the Feed Screw: During maintenance, pull out the extruder screw and specifically measure the depth of the flights in the feed section. Compare it to the spec. If it’s worn, it needs to be rebuilt or replaced.
Quick Diagnostic Tip: Watch the amperage of the main screw motor. If it’s constantly fluctuating wildly, you have a feeding problem. If the material in the hopper is moving down in a smooth, consistent “plug,” your feeding is good. Start by observing the material in the hopper for 5 minutes—does it flow or does it cling?
Problem 5: Why Does the Extrusion Process Drift or Become Unstable Over Time?
You start the day perfectly, but by afternoon, the strip quality changes. This drift erodes profits and trust.
Process drift is often a thermal management failure in cold extrusion. As heat builds up in the screw, barrel, and mold, the silicone’s viscosity changes. The solution is proactive cooling system maintenance and process parameter discipline.

Dive Deeper Paragraph:
A line that can’t hold settings is a line that can’t be trusted. For cold silicone extrusion, “thermal runaway” is your silent enemy.
Root Cause Analysis:
The process creates heat; if you don’t remove it consistently, everything changes.
- Inadequate Cooling Capacity: The industrial chiller may be undersized, its filters clogged, or its setpoint drifting. It cannot remove the frictional shear heat as fast as it’s generated.
- Degrading Cooling Efficiency: Scale or biofilm builds up inside the mold cooling channels or the barrel cooling jackets, acting as an insulator. The extruder screw core cooling may fail.
- Uncontrolled Variables: Operators might slowly increase screw speed to boost output, unknowingly generating more heat than the cooling system can handle.
Step-by-Step Solutions:
Stability requires a systems approach to temperature.
- Audit and Maintain Your Cooling System: Treat your chiller like a critical asset. Schedule regular maintenance: clean filters, check refrigerant levels, and calibrate temperature sensors. Periodically flush the mold cooling channels with a descaling solution.
- Establish and Lock Key Parameters: Define a “Sweet Spot” for your product: screw speed, head pressure, and chiller temperature. Do not let operators change these freely. The goal is a stable thermal equilibrium.
- Implement Process Monitoring: Use the data. Log the stable temperature of your mold at the start of a good run. If that temperature starts creeping up during the day, it’s a red flag that cooling is failing or a process parameter has drifted.
Quick Diagnostic Tip: Place your hand on the mold at the start of a run (carefully). Remember how it feels—cool, not cold. Check it again every few hours. If it gets noticeably warmer to the touch, your process is drifting due to heat buildup. Start by checking the chiller’s supply and return water temperature.
Conclusion
The most common silicone extrusion problems are predictable and solvable. They point to fundamentals: material preparation, tooling precision, surface chemistry, mechanical feeding, and thermal management. Mastering these turns reactionary firefighting into proactive process control.
Tired of fighting the same defects and losing production time?
Let’s diagnose your specific issues. I can review your process parameters, material specs, and defect samples to provide targeted solutions that get your line back to consistent, profitable production.
Contact me, Eason, for a troubleshooting consultation. Send me pictures of your problem strips—let’s fix them for good.